This is the first part of the WRK series. For your convenience you can find other parts using the links below (or by guessing the address):
Part 1 – Compiling and debugging
Part 2 – Monitoring and function invocation
Part 3 — Syscall
Part 4 — New module
Nowadays Microsoft is very happy to share code of its tools with the open source community. But it wasn’t always the same — .NET Framework code wasn’t freely available, however, there was the project Rotor (or Shared Source CLI 2.0) which was a .NET implementation for research purposes. You could download the code, compile it on your own and experiment with the internals of the platform. It wasn’t exactly the same though, but it was good enough to see the code and play with it.
Similarly, there was a project with Windows OS source code, namely Windows Research Kernel. In this series we are going to compile the code, change some of its internals and see it in action.
WRK
Windows Research Kernel (WRK) is a source code of the kernel of Windows Server 2003 SP 1. It was released for research purposes so you couldn’t download it just like that, however, right now you might find it on Github pretty easily. The code is old, which means that getting it to work is a little hard, however, you should be able to follow the guide Getting started with WRK.doc to compile the project since it comes down to just running the bat file (assuming you have installed all of the dependencies). You can build the code for x86 and x64. There is also a solution (VS 2008!), you can just choose the configuration and build everything with your favorite IDE.
But the kernel is not enough, you need to have the rest of the Windows OS to actually test it. That’s why it was distributed with virtual machine based on Virtual PC 2007 (do you even remember this application?) which you could use to boot the kernel. The Windows Server 2003 installed in that VM was a little different than the normal one, i.e., it was showing the build number of the desktop so you could see which kernel you booted. Also, it had SP 1 installed and disabled updates because SP 2 was not compatible with the WRK.
Debugging
Let’s start with enabling debugging for the VM. I assume you downloaded the WRK and the VM image and you can run it correctly. I will be using VMWare Player. By the way, did you know that you can use the same hard drive file for VMWare, Virtual Box and Hyper-V? This way you can configure your VM to be able to boot it with any hypervisor you like, and also support boot to VHD to use it natively on your machine. Pretty cool.
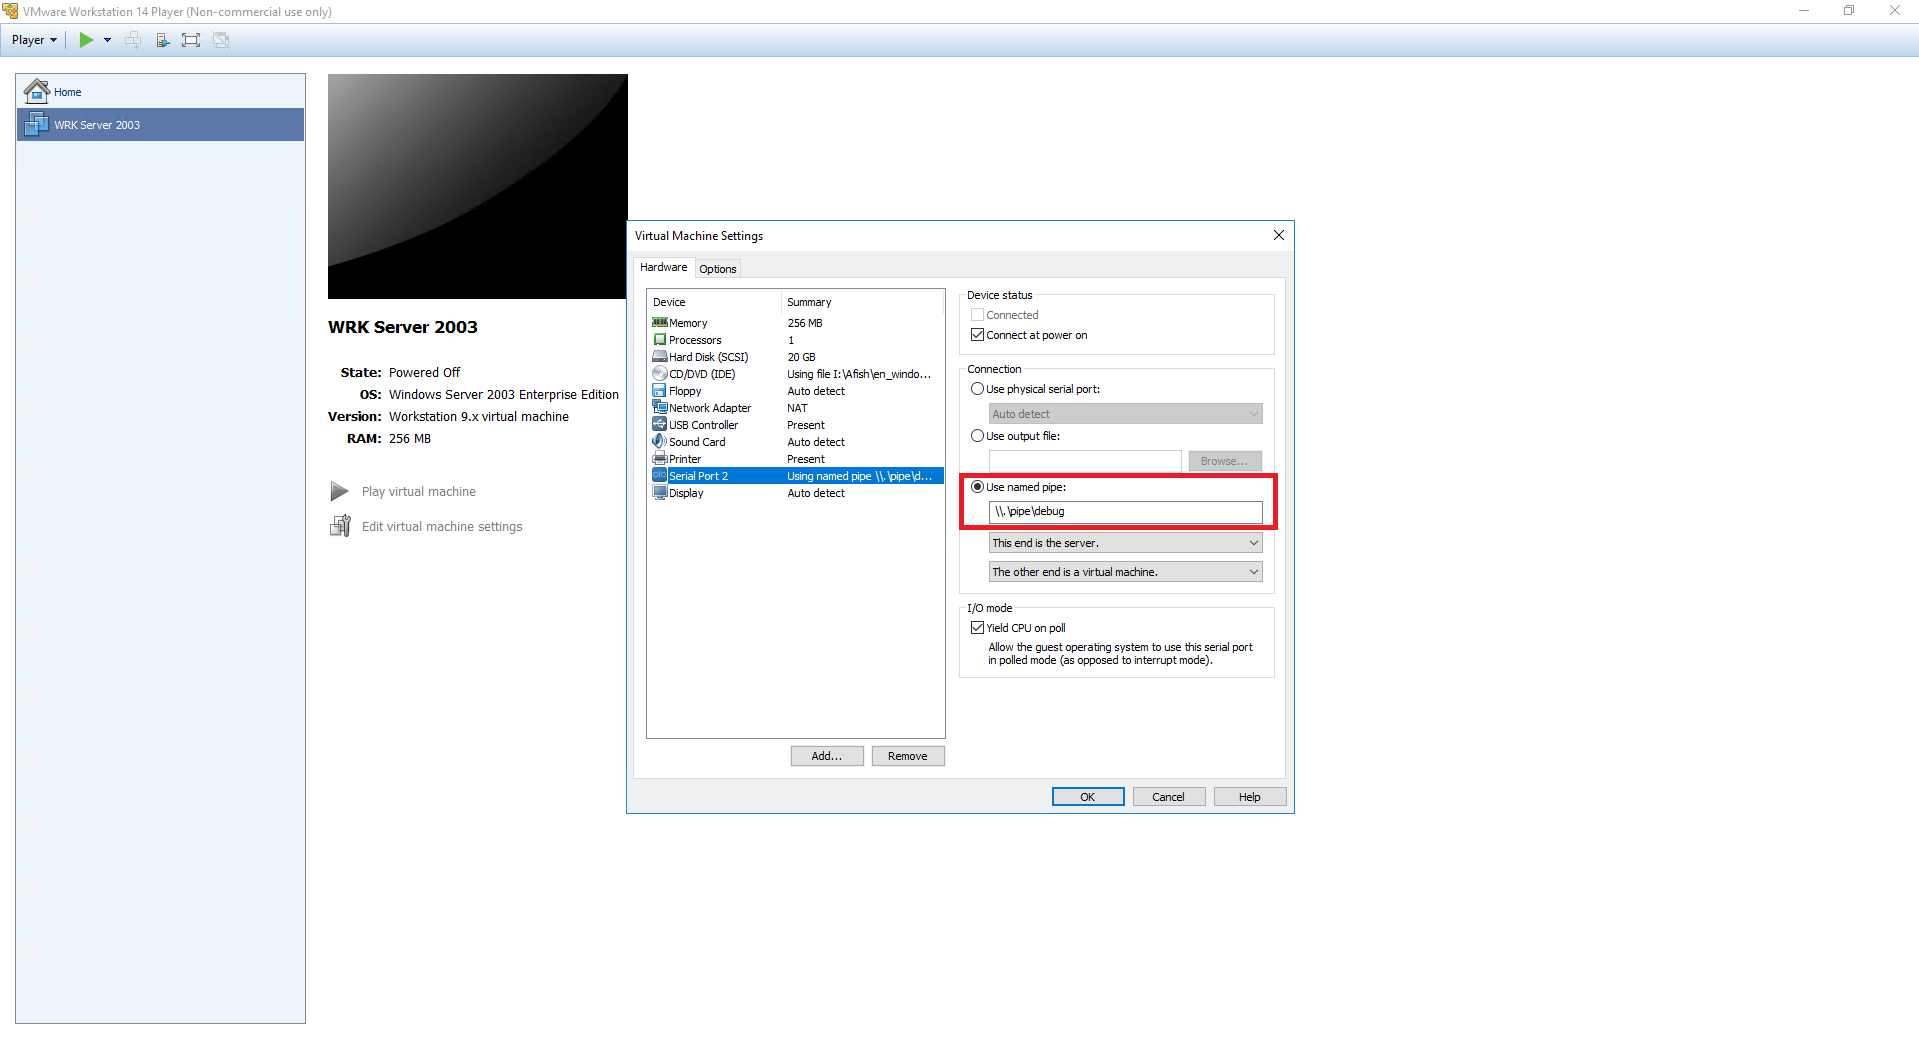
First, you need to configure serial port for the machine and expose it as a named pipe for the host. You can see the configuration below:
The OS should have debugging enabled by default. If it is not, then you need to add the following to the boot.ini:
|
1 2 3 4 5 |
default=multi(0)disk(0)rdisk(0)partition(2)\WINDOWS [operating systems] multi(0)disk(0)rdisk(0)partition(2)\WINDOWS="Windows Server 2003, Standard" multi(0)disk(0)rdisk(0)partition(2)\WINDOWS="Windows Server 2003, WRK" /kernel=wrkx86.exe /hal=< your HAL > /debug /debugport=com1 multi(0)disk(0)rdisk(0)partition(2)\WINDOWS="Windows Server 2003, WRK - No Debugger" /kernel=wrkx86.exe /hal=< your HAL > |
Remember to set correct HAL.
Finally, you need to configure WinDBG. Just use the following settings:
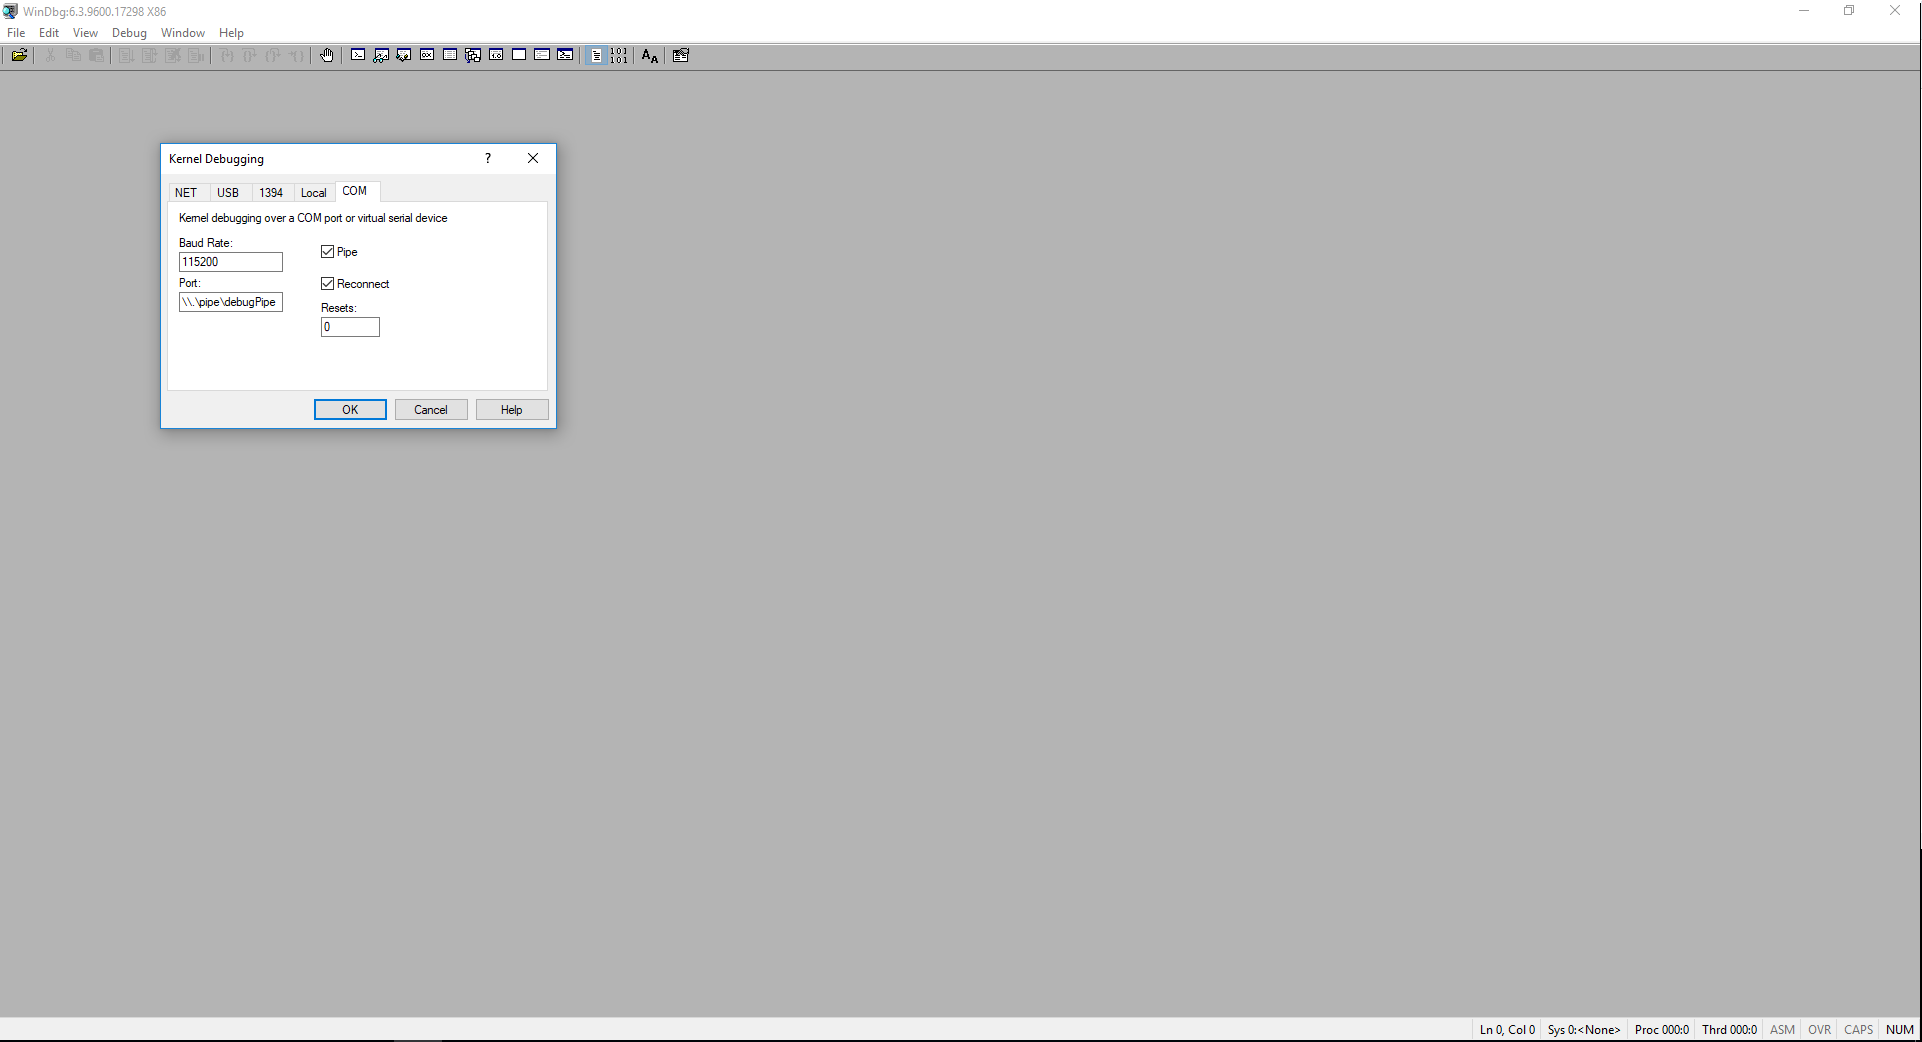
Also, configure your symbols to the correct directory. You can automate this by using the following script to run the debugger:
|
1 2 3 4 5 |
@echo off set wrksymbols=%wrkpath%\base\ntos\BUILD\EXE set dbgpipe=\\.\pipe\debugPipe set dbgargs=-k com:pipe,port=%dbgpipe%,resets=0,reconnect -y %wrksymbols% windbg %dbgargs% |
Done. You should now be able to debug the kernel and play with it.